Wednesday, March 20, 2013

Simple Easter Decor


With Easter right around the corner, thought it was time to decorate the house. Not really, but I did want it to be a little festive. There are a few holidays that I don't go all out for, Easter is one of them. The significance of the day is not really about eggs and bunnies. I associate the Easter egg decorations with children, fun, and the beginning of spring. So, with that thought in mind, and I do have children, not little children, but still children, and a wonderful grandson. Must add a bit of fun for everyone. Even when the kids seem like they don't even notice anything you do, they really do. Any ways, my idea of decorations this year? Very egg-y. Eggs everywhere. Remember the glittered eggs? Of course you do.

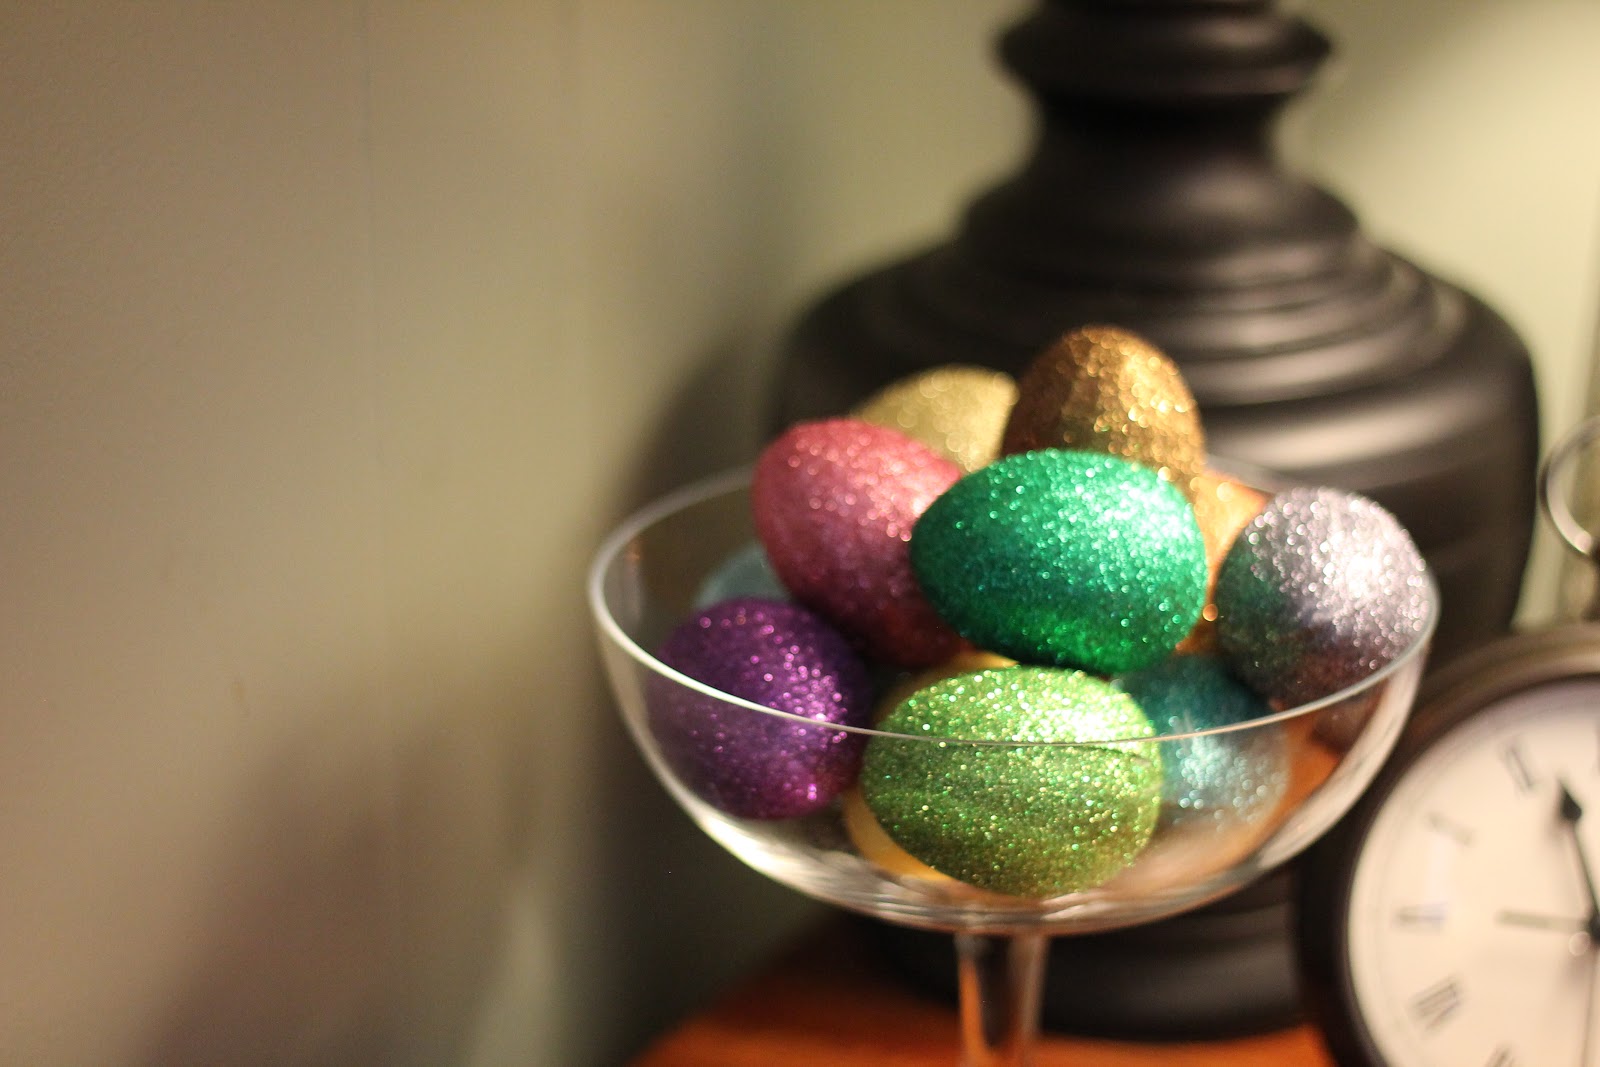
Glittered Eggs. I wish they were candy.

They look so pretty with the different lighting during different parts of the day. Pretty. Pretty. Pretty.

Jeweled colored eggs. Pretty without the lid too.

These eggs were made last year. Styrofoam eggs, some wrapped in white cotton yarn. The others were wrapped with jute, some heavy jute, and some with a thinner jute. They turned out great, Nice and neutral in color. They could be left out all year, but I do put them away after Easter.

Love the container. It's very versatile.

Really fun project to do on a rainy day. Wrap something in jute. It's amazing what you can do with a hot glue gun and jute (or yarn).

Added some moss to the bottom, gives it some depth and color.

Another find at Hobby Lobby a few years ago, egg baskets. How stinkin' cute is that? I have two, the other is larger, and it is very useful. Okay, I don't have a chicken coop, so I don't really use it to bring eggs into the house, but I do use it for other things, and decorations.


Fake eggs, of course, but really cute and simple.

Another one of those versatile containers that can be dressed up over and over again, it's great. I might have to find pictures of the different ways I've decorated these. But I'm so used to it, sometimes I don't even take pictures once they are decorated. Note to self: always take pics.

Love the little nest and moss at the bottom.

The tops of these candle holders are removable, and can be used alone as tealight or votive holders. It's nice to keep them all different, but with the same theme if they are grouped together.

A little decoration goes a long way.

These took about 5 minutes to put together. I was really trying to keep it simple this year. If I have to fuss to much with it, then it's just not worth it, right now. We've been busy.

The egg cup is adorable, it came in a set of four.

Every year I try to make sure that I display this little ceramic basket. My MIL gave this to us quite a few years ago. She didn't want it, but I don't think she had the heart to throw it away or donate it. She took a ceramics class years and years ago, well over 20 years have passed since she made this basket. Her name is inscribed in the bottom as well. The handle was cracked on one side when we got it, so we repaired it and gave it new life. She gets so tickled every time she comes over and sees it being used.
Another simple and adorable decoration. The tiny plastic eggs were from last year, I bought them and never used them for anything. By the way, they look a little like candy, beware. I had the moss, nest, and eggs in my craft stash.

Another 5 minute decoration. Simplicity is key.
This one took a little longer, because I had to dig out my cricut machine. Going to the store to purchase a stencil sounded like too much work. Using the cartridge that was left in the cricut, I printed "Happy Easter" in 1 inch letters and then used the cut out as a stencil. Worked out beautifully, even though I had to stick the little inner piece of paper to the inside of the "P"s, "A"s, and the "R".  It really was very easy. Of course, I still have burlap sitting around, remember the lampshade projects? Cut an 8in x 10in piece of burlap and stenciled "Happy Easter" using black acrylic paint from my paint stash. The eggs and ribbon are on the outside of the glass. Cutie.

On the mantle. Fresh and serene.

Every room should have a plant. Yes, every room. Be careful if you have pets. Know your pets and know your plants. Some plants are very poisonous to pets, trust me, I found this out the hard way about two years ago. I was given an Easter Lily as a gift two years ago, and had a cat that loved to eat anything green. Honestly, never seen a cat that at so many plants. Let's just say, cats and Easter Lilies, bad idea. Really bad idea. She was a great cat. I still get sad when I think of her.

It's a healthy plant, longing for the spring like the rest of us.

Remember the glittered candle? Yes, it sits on the mantle as well. It's super sparkly in the sunshine, really brightens the place up.

Yeah for simplicity.

Here's an adorable wreath that I made about a year ago. The only thing I did was walk by it and put two eggs on the same hook. It always has that light green ribbon on it. Yup. Just put a couple of eggs on the hook. Wow, that was the most labor intensive decorating....ever. I think a nap is in order.

Green wreath with eggs. Note the cracks on the green egg. Perfection.
Well, it was fun. And really easy decorating this year. Love it! Not too much, but enough that it feels like spring is right around the corner. Today is the first day of spring? I think so. Doesn't feel like it, there's snow and lots of wind outside. It's cold!! But the little signs of Easter in the house make it better, because spring can't be far away now.

Monday, March 18, 2013

Glitter Eggs


Easter is just around the corner. Aaahhhhh! That means spring is close at hand, as well. Yippee!!!! The house didn't look too spring like inside, still had that same snuggled in winter feel to it, not to mention the pine garland on the mantle that my husband loves so much. Ok, I had been wondering how to add some Easter-like decorations, without having it look just like it did last year. It's nice to change things up and keep it fresh. Looking through one of my favorite catalogs, Pottery Barn, I spied some cute glittered eggs, in muted colors. Darling, expensive, and muted colors. Hmmmm. I liked one of the three, darling. That was it. Our little house doesn't get enough sunlight, especially this time of year, to pull off the muted decorations, without making the area feel drab. I need to have a little pop of color here and there. You know the drill, just make it yourself. Of course this called for a trip to (drum roll please), Hobby Lobby, a.k.a., the Land of Somuchpretty. 

Fortunately, the only thing that I needed for this project was styrofoam eggs. And because the people that work at the store must have known that I was on my way, because they were on sale for 40% off. Bonus!!!! So, for about $6, I could make 12 glittered eggs, as opposed to $16.50 for 3 eggs, now on sale for $12.99. Yeah, it just doesn't make sense. Oh well. 

Time to get to work by gathering the eggs, Mod Podge, toothpicks, a floral foam brick, a paint brush, and glitter. Oh, and of course something to cover the table surface. Glitter is a bear to clean up. I used newspaper, so I could just shake the glitter out in the outside trash bin, and put the newspaper in the recycling bin.

Stick one toothpick in the end of each egg. This is very helpful, you have something to hold on to and won't get glue and glitter all over you hands. Work with one egg at a time, from glue to glitter, then go on to the next eggs. You wouldn't want your glue to dry while trying to put glue on all of your eggs.

Foam eggs, with toothpicks in the bottom as a handle to hold on to.
Using a medium sized, craft paint brush, put Mod Podge all over the surface of the egg. Ok, I actually found that the sloppier I was at this stage, the better the eggs turned out at the end. In other words, neatness is not a real factor at this stage, but use a good amount of the Mod Podge.

Mod Podge. Great stuff, and it seems to last a long time. A lot of projects in one bottle.
Lots of different color glitters from my stash of craft goodies in the basement. Purchased these 2 years ago to make some cards, and it's just been sitting there, taking up valuable space. The colors are so pretty.

An assortment of colored glitter.

Use the floral foam brick as a drying area for the eggs, after applying the glue and the glitter. Just stick the toothpick in the foam, and you don't have to worry about smudging your eggs, or having them stick to anything.

"Drying Rack" for the eggs. There's a lot you can do with floral foam.

After gluing and glittering the eggs, this is what I had. The toothpicks are a great help, as is the floral foam. I think they turned out great.

Pretty eggs. 

This was a fun project, and it was very easy and quick. I just can't argue with either of those qualities in a project.

The egg on the end was the first one done, and I was being way too neat, the glue was a bit streaky.

They really do look pretty in the sunlight and add a big pop of color. I could have easily done one or two colors only, but I just couldn't decide, so I did 12 different colors.

Pretty. Pretty. Shiny. Shiny.
After letting them dry for a few hours, I put them in this dish. It' actually a candy dish, but it's rather large, all 12 eggs are in the dish. Cute as can be.

This really brightens up a corner in the room.

 The glitter fever did hit me, and I glittered a candle as well. It was an old candle in the emergency kit, really ugly and old, and now......it's beautiful. Yes, another idea from Pottery Barn. You got it, they had a glittered candle also. I wasn't in the mood for silver, or the chunkier glitter. I did a chunky glitter project during Christmas, but I loved the gold/bronze color of this particular glitter. It has no specific season. Beautiful!! No, I won't display it on that oh so chic, paper plate.

All that glitters is not gold.

So, it was fun, easy, economical, and quick. Just what you want when time is short and you want to add a pop of color to a room. Grab something, get the glue and glitter and you're on your way. Just don't grab your dog. I can only imagine that it just wouldn't be a very pretty situation.

Go enjoy the cold weather for a little while longer, spring is almost here.

Saturday, March 9, 2013

Tin Pail Makeover


March is here and it almost smells like spring outside. Almost, not quite. Still have to get past the patches of snow on the ground, but they should be gone by tomorrow. The planting beds are clear of snow and the plants that aren't cut back in the fall are visible. Pitiful looking, but visible. This time of year I find myself looking at pictures of the yard from previous years, and I came across a little project that I did last May. The Corona tin pail that was collecting dust on a shelf in the garage needed a purpose. It was a very thoughtful gift to my husband from a friend of mine. She gave it to TM because she didn't want him to feel left out at the time of my bridal shower, some 5 to 6 years ago. Very sweet of her. It was filled with 4 really nice pint size glasses. The glasses are tucked away in TM's man cave, a.k.a. the garage. The pail just sat on the shelf. 


I wanted to use it in the yard, with the other old tin pail that is used for collecting clippings while walking through the yard. But it needed a makeover!!!! Corona is fine, but it's not pretty at all, or even cute. This is what it looked like after I was finished. Horrible lighting.


Go play in the dirt.

The pail needed a chalkboard area. That was my plan, a rectangle of chalkboard paint on each side of the pail, covering the logo and words. No problem. Right?


The wonderful Corona pail. Not real pretty for the garden.


Searched the garage for supplies: Sandpaper, chalkboard spray paint, and painter's tape. Great, we had all three. And of course newspaper to protect the area. Things were going better than I had hoped.


Supplies needed: sandpaper, chalkboard spray paint, and painter's paint.

Taped off the pail, leaving the area that I wanted to sand and paint. Easy as pie! It went pretty quickly also.

Tape the surfaces you don't want painted. Make sure you get all of the surfaces.

And here is where the mistake was made. See all that open area on the side of the pail? No tape or covering. Have you ever heard of the term "over spray"? I had, on lots of occasions. But did I think about it at the time? Of course not. Too busy going full steam ahead and not planning or thinking the project through before I started. This did come back to haunt me, in a big way.


Spray paint does spray in a wider area than you want, cover all surfaces you don't want painted.

Not thinking about the "over spray", I sanded the pail and got the spray paint. Painted with the ease of someone who has done this before. Let it dry for a few hours, sprayed a second coat and let that dry for a few hours. Just as pleased as punch with myself, and tickled that it was so easy. Then.....I removed the tape. See the sides in the above picture? Yeah.....they had lots of over spray. Lots of over spray. Again, lots of over spray. Not solid, but extremely noticeable and dark. Dang it!!!! After pondering for a while, a trip to the craft store was in order. I purchased a pack of peace sign stickers for about $1, on sale, and went home. 


Scuff the surfaces to prepare for painting. The paint will adhere better than it will on smooth surfaces.

Spent a little more time sanding the rest of the pail, really just scuffing the surface so the paint sticks. Placed a few of the stickers on the pail, then proceeded to spray paint the entire pail, spraying over the stickers as well. You know the drill, I had to let it dry, then apply a second coat. Okay. So after it was dry, I used a stick pin to lift just a small piece of the edge of the sticker, and very slowly removed the stickers so as not to peel off any paint. It actually turned out pretty well.


Cute little peace signs on the can made it more interesting.

Following the directions on the spray paint can, it needed to dry for 24 hours, then chalk had to be rubbed all over the surface, then wiped off. Not difficult at all.


This is a great time to be messy. Just have fun, get messy.

Pardon the terrible lighting, but here is the finished product. After using it all of last summer, it looked better at the end of the summer than it did in the beginning. It was a little more weathered by the end of the summer. It works great, like a pail. We all had fun writing various messages and drawing various pictures on it during the summer months. By the way, if you have teenage sons, you might want to hide the chalk.

All done! It turned out well.

This turned out better than I thought it would, after having made the mistake of not covering all the surfaces that I didn't want paint on. But as with any mistake, it's a learning experience, now I know what to do and what not to do next time I take on a project like this one: Think the project through to the end, before starting, and cover all of the surfaces that I don't want to get paint on. Simple enough.

It's really starting to feel like spring is just around the corner. I'm so excited. That means that soon....I will be able to......GO PLAY IN THE DIRT!!!!!!!!!!!!! Yippee!!!

Wednesday, March 6, 2013

Cats Don't Watch Hockey


Cats watching hockey? Well........it's not a common occurrence, at least not in our house. However, there is the rare siting of the wild, ferocious, saber toothed, feline reclining in the wild jungle (a.k.a. the family room), watching an invigorating game of ice hockey. What?!! Really?!! Okay. It's more like our cat thinks she's human and decides that she wants to sit on the couch and stare at the movement on the television.

I was actually looking at the first pictures of "The Lamp" and the cat pictures were the last pics just prior to the lamp, needless to say after about 10 minutes of giggling at what a goof ball my kitty is, I just thought I would share her antics.

My son, GG, and I were watching our beloved Detroit Red Wings one night. And in saunters one of our cats, Dahlia, and proceeds to get really comfortable on the couch. We didn't pay much attention to her at this point, because she does this whenever anyone sits on the couch. This time she didn't try to do her impression of a cat sweater by climbing on said sitter and covering as much of their upper body as possible. No, this time she positioned herself at the end of the couch on a pillow, propped herself up like her human counterparts and proceeded to watch the game with us. Of course, at that point we both stop watching the game and began watching her.

Really? What cat sits like this?

It's obvious, by the way her eyes started to droop after she was comfortable, that she's been watching my husband's behavior on the couch.

"My eyelids are a little heavy."

Again, like my husband, the next step is to pretend not to be tired. Wide awake, just watching the game.
"Who, me? I wasn't sleeping."
 She's a funny little cat. Cute as a button, and a bit of a terror monster, but she's fun to have around. We do love our little furry family members. I read someplace that children in families that have pets, are happier. No, I don't remember where it was that I read that information, and I don't even know if it's true, but they do tend to make us smile.

"What? You've never seen a cat watch T.V.?"

Just look at her. I kid you not, this is not staged. I don't think we could have gotten her to sit like this if we tried. And why would anyone want to do that?

"Hockey's great. Oooh! Oooh! Nice pass. Even better hit."
 I knew it, she spends way too much time on the couch with my husband, she has the pattern completely memorized and has duplicated it well. See the closed eyes? Yes, she's giving in to sleep at this point.

She obviously didn't have enough cat naps today.

Then the slouching starts.

Are you kidding me?!! How can she sleep like that?
Needless to say, my son and I laughed and giggled while we watched her fall asleep. I finally couldn't take it and scratched her head. She just looked at me as if to say, "Hello. I'm sleeping here." Crazy feline #1. Thought I would share the antics of one of my silly, furry girls with you.

Enjoy your day. Cherish your furry family members, they're great to have around.

Monday, March 4, 2013

Burlap Lampshade: The Test


All of the materials for covering the lampshade had been gathered in one area, and sat there for days. Why? Because I'm a big chicken!! It's scary trying something new. What if I make a mistake? What if it doesn't turn out well? What if I don't like it? What if.....what if? Who cares! What if it turns out great?! What if I learn how to do something along the way?! How about no more what ifs? That's what I finally had to tell myself. Just stop fretting and do it. That worked for about 5 minutes and then a brilliant idea came to me. Try it on something no one will see, like the ugly lamp in the bedroom. So I did just that last weekend.

The lamp that this shade came from, well let's just say it's not my favorite. My husband has had this lamp forever. Truly, forever, possibly 30 years. He has moved it from country to country, state to state, and house to house. It must be a special lamp, so I have vowed to myself not to get rid of it, but I am going to change it.

Lampshade from a lamp in the bedroom.

Started this process by laying the seam of the shade at the edge of the fabric, then tracing the outline with a highlighter as I went along. This is not a straight cylinder, therefore I couldn't cut a straight strip of fabric.

Roll and carefully trace the outline.

By the way, yellow highlighter doesn't work very well, it was very difficult to see. I switched to orange, very early in the tracing process. After tracing, I cut about an inch outside of the outline.


The fabric is curved. Cut 1 inch outside for the overlap at the top and bottom.


After wrapping the burlap around the shade to see how it would look, I didn't like the fabric showing through the burlap, so I decided to remove the old fabric, which I quickly realized was plastic, stretchy...stuff. The inner layer of actual fabric, I left in tact.


Plastic is easy to remove. Quite lovely, isn't it? Not really.


Wrapping the fabric around the remaining frame and clipping it with binder clips gave me an idea of how it would look when it was finished. Glad I did this first, because I didn't like it one bit. Because of the way I started rolling the shade on the fabric, the grain of the fabric was diagonal at the front center, but straight at the seam, which would be in the back. One thing to change. I put the lampshade back on the lamp, while it was clipped, and turned on the lamp. Because I had removed the outer plastic stuff, it was now really thin and see through, I could see the actual lightbulb when the light was on. That would never do. Two things to change. Just glad I found out these two things before gluing the fabric.

Do a test run on the lamp, with the light on and off.

You can see just how thin the fabric looked, with the sun coming in the window behind it. Not a good, cozy feel for the lamp. At this point, I decided to use another layer of burlap, so there would be two layers. It would take care of both of the problems that I had run into. The thickness of the fabric would diffuse the light and I could start my rolling of the fabric by placing the front of the shade in the position on the fabric where the grain would be straight. Then rolling the shade to the left to mark the seam, and then to the right to mark the the seam, and of course, some for the fold and overlap. This worked out well, a tip to remember from this point forward.


This is how the back of the shade looked before adding the second layer of fabric.

After laying the two layers of burlap on the table, wrapping the shade, and clipping the burlap to the shade as I went along, it looked much better. It really didn't take very for this step, but it was well worth it. I also put the shade on the lamp again to see how it would look. It was turning out well.


The light coming through the window is much more diffused. Better!

The larger binder clips were used to hold the seam. This was helpful, as I knew exactly where the seam was when looking at the shade. When researching this project, I saw that some people used clothes pins to hold the fabric in place. Well, all of my clothes pins are up north in the camper, and I happened to have a lot of binder clips. I have so many, it makes me wonder why I have that many. (Insert shrug here) They worked great for this application, they also make great chip clips.

The diagonal grain of the burlap is now at the back of the shade. No one will see it.

Then came the scary part, the gluing. This was not turning out to be like the "real" lampshade that I want to cover, that one involves gluing the fabric directly to the shade. I had nothing to glue to, except the inside upper and lower edges. So that's what I did. Using my trusty hot glue gun, I started to run a bead of glue along the inner edge of the lampshade, in the same spot where there had been glue from the plastic stuff that was taken off earlier. After gluing a section, I replaced the binder clips to hold the fabric in place and give it time to dry.

The glue is actually thick enough that it holds both layers of burlap.

After gluing the top and bottom inner edges, I started removing the clips on the seam. Laying a bead of glue along the seam edge, care not to use too much, and also to start a little bit away from the edge, to leave some room for the glue to spread when I smoothed the fabric, without the glue squeezing out of the seam and being seen.

Be careful with the glue gun and don't use too much glue. Those clips are handy.

After all of the gluing was done, drying time didn't take very long. If you've ever used a hot glue gun, you know what I mean. The clips worked great as a little stand as well.


Let glue dry thoroughly before removing clips.

My mother has called me a perfectionist, on more than one occasion. I don't agree with her, but the raw edges were bugging me to the nth degree.  Cutting strips of burlap, and grabbing some heat-n-bond from the sewing bucket, I began making trim for the inside of the lampshade to hide the edges. The jury is still out on how well this worked, the heat-n-bond, that is. Using the iron, I folded over the flaps so that when I turned it over, there would be no seam.


Strips of Heat-n-Bond and burlap for the inside trim.

Unfortunately, a decision had to be made, the super hold, in the pink package, or the ultra-hold, in the red package? I opted for the super hold, not the correct choice, but it worked. It didn't hold the burlap together very well, but it was sufficient, the burlap stayed in place and was stiffer than it was.


Next time, I'll use the ultra-hold.

After ironing the strips of burlap, with the heat-n-bond in them, I used the hot glue gun to attach the trim to the inside of the lamp shade, hiding all of the raw edges. Where the hardware is, I used scissors and clipped the fabric just a bit to make it fit around the wire. This worked great. Any little bit of frayed fabric was dealt with by a small dot of glue from the glue gun, and pressing the strands down into the glue. You can't see it at all.


The trim turned out quite nicely.

All done! Was pretty impressed with how the seam turned out considering that it's only glued to fabric and the iron wasn't used on the back seam at all.

The back of the lampshade.


The fabric is much straighter and the light is very diffused, great for the bedroom. I think it had turn out well.

See the natural "blemish" on the fabric, little fibers in burlap.

Of course I just had to see what it would look like back on the ugly lamp. The shade looks great! Still don't care for the lamp. But, it gave me a chance to try my hand at covering a lampshade. I've learned more than one thing doing this project. That's a good thing. I also now have a plan for the lamp, if it works, then it will stay in the house. If it doesn't, I'll have to make a case for getting rid of the lamp.


Nicely done! It looks good.


Here's how it looks with the light on. Great, I can't see the light bulb, just the light. So much better with two layers of burlap on there. Had I not removed the plastic covering, I could have only used one layer.


Nice and cozy lighting.
Now that the lampshade has been covered in burlap, and I've told TM what I want to do with the lamp,  he's asking if he can have it back on his side of the bed to use. That's just typical. It will look nice. As soon as the weather warms up here, the lamp is getting a nice coat of satin black spray paint. I think it might actually look nice. We'll see about that. On to the "real" lampshade. That's a lot of gluing. Well, I've got to try.

Enjoy your day!!